
The complete guide to internationalization in Next.js
Editor’s note: This article was updated by Emmanuel John in December 2025 to include information on the next-intl component and refresh code snippets in line with recent updates to Lingui, Next.js, and AppRouter/RSC.

Translating web applications into multiple languages is a common requirement. In the past, creating multilingual applications was not an easy task, but recently (thanks to the people behind the Next.js framework and Lingui.js library) this task has gotten a lot easier.
In this post, I’m going to show you how to build internationalized applications with the previously mentioned tools. We will create a sample application that will support static rendering and on-demand language switching:
Setup
First, we need to create Next.js application with TypeScript. Enter the following into the terminal:
npx create-next-app --ts
Next, we need to install all required modules:
npm install --save-dev @lingui/cli @lingui/vite-plugin @lingui/swc-plugin
npm install --save @lingui/react @lingui/core
Next.js now uses SWC by default (not Babel), making the older @lingui/loader and babel-plugin-macros packages deprecated, while make-plural is now included in @lingui/core.
Internationalized routing in Next.js
One of the fundamental aspects of internationalizing a Next.js application is internationalized routing functionality, so users with different language preferences can land on different pages and link to them.
Additionally, with proper link tags in the head of the site, you can tell Google where to find all other language versions of the page for proper indexing.
Next.js supports two types of internationalized routing scenarios.
The first is subpath routing, where the first subpath (www.myapp.com/{language}/blog) marks the language that is going to be used. For example, www.myapp.com/en/tasks or www.myapp.com/es/tasks. In the first example, users will use the English version of the application (en) and in the second, users will use the Spanish version (es).
The second is domain routing. With domain routing, you can have multiple domains for the same app, and each domain will serve a different language. For example, en.myapp.com/tasks or es.myapp.com/tasks.
How Next.js detects the user’s language
When a user visits the application’s root or index page, Next.js will try to automatically detect which location the user prefers based on the Accept-Language header. If the location for the language is set (via a Next.js configuration file), the user will be redirected to that route.
If the location is not supported, the user will be served the default language route. The framework can also use a cookie to determine the user’s language.
If the NEXT_LOCALE cookie is present in the user’s browser, the framework will use that value to determine which language route to serve to the user, and the Accept-Language header will be ignored.
Configuring our sample Next.js app
We are going to have three languages for our demo: default English (en), Spanish (es), and my native language Serbian (sr).
Because the default language will be English, any other unsupported language will default to that.
We are also going to use subpath routing to deliver the pages, like so:
// next.config.js

module.exports = {
  experimental: {
    swcPlugins: [["@lingui/swc-plugin", {}]]
  },
  i18n: {
    locales: ['en', 'sr', 'es', 'pseudo'],
    defaultLocale: 'en'
  }
}
In this code block, locales is all the languages we want to support and defaultLocale is the default language. The SWC plugin configuration is required for Lingui macros to work with modern Next.js.
You will note that, in the configuration, there is also a fourth language: pseudo. We will discuss more of that later.
As you can see, this Next.js configuration is simple, because the framework is used only for routing and nothing else. How you are going to translate your application is up to you.
Configuring Lingui.js
For actual translations, we are going to use Lingui.js.
Let’s set up the configuration file:
// lingui.config.js

import { defineConfig } from "@lingui/cli";
export default defineConfig({
  sourceLocale: "en",
  locales: ["en", "sr", "es", "pseudo"],
  pseudoLocale: "pseudo",
  fallbackLocales: {
    default: "en"
  },
  catalogs: [
    {
      path: "<rootDir>/src/locales/{locale}/messages",
      include: ["src/pages", "src/components"]
    }
  ],
  format: "po"
});
The Lingui.js configuration is more complicated than Next.js, so let’s go over each segment one by one.
locales and pseudoLocale are all of the locations we are going to generate, and which locations will be used as pseudo locations, respectively.
sourceLocale is followed by en because default strings will be in English when translation files are generated. That means that if you don’t translate a certain string, it will be left with the default, or source, language.
The fallbackLocales property has nothing to do with the Next.js default locale, it just means that if you try to load a language file that doesn’t exist, Lingui.js will fallback to the default language (English, in our case).
catalogs:path is the path where the generated files will be saved. catalogs:include instructs Lingui.js where to look for files that need translating. In our case, this is the src/pages directory, and all of our React components are located in src/components.
format is the format for the generated files. We are using the po format, which is recommended, but there are other formats like json.
How Lingui.js works with React
There are two ways we can use Lingui.js with React. We can use regular React components provided by the library, or we can use Babel macros, also provided by the library.
Linqui.js has special React components and Babel macros. Macros transform your code before it is processed by Babel to generate final JavaScript code.
If you are wondering about the difference between the two, take a look at these examples:
//Macro
import { Trans } from "@lingui/react/macro"

function Hello({ name }: { name: string }) {
  return <Trans>Hello {name}</Trans>
}


//Regular React component
import { Trans } from '@lingui/react'

function Hello({ name }: { name: string }) {
  return <Trans id="Hello {name}" values={{ name }} />
}
As you can see, the code between the macro and the generated React component is very similar. Macros enable us to omit the id property and write cleaner components.
Now let’s set up translation for one of the components:
// src/components/AboutText.jsx

import { Trans } from "@lingui/react/macro"

function AboutText() {
  return (
    <p>
      <Trans id="next-explanation">My text to be translated</Trans>
    </p>
  )
}
After we are done with the components, the next step is to extract the text from our source code that needs to be translated into external files called message catalogs.
Message catalogs are files that you want to give to your translators for translation. Each language will have one file generated.
To extract all the messages, we are going to use Lingui.js via the command line and run:
npm run lingui extract
The output should look like the following:
Catalog statistics:
┌──────────┬─────────────┬─────────┐
│ Language │ Total count │ Missing │
├──────────┼─────────────┼─────────┤
│ es       │      1      │    1    │
│ en       │      1      │    0    │
│ sr       │      1      │    1    │
└──────────┴─────────────┴─────────┘

(use "lingui extract" to update catalogs with new messages)
(use "lingui compile" to compile catalogs for production)
Total count is the total number of messages that need to be translated. In our code, we only have one message from AboutText.jsx (ID: next-explanation).
What’s missing? The number of messages that need to be translated. Because English is the default language, there are no missing messages for the en version. However, we are missing translations for Serbian and Spanish.
The contents of the en generated file will be something like this:
#: src/components/AboutText.jsx:5
msgid "next-explanation"
msgstr "My text to be translated"
And the contents of es file will be the following:
#: src/components/AboutText.jsx:5
msgid "next-explanation"
msgstr ""
You will notice that the msgstr is empty. This is where we need to add our translation. In case we leave the field empty, at runtime, all components that refer to this msgid will be populated with the string from the default language file.
Let’s translate the Spanish file:
#: src/components/AboutText.jsx:5
msgid "next-explanation"
msgstr "Mi texto para ser traducido"
Now, if we run the extract command again, this will be the output:
Catalog statistics:
┌──────────┬─────────────┬─────────┐
│ Language │ Total count │ Missing │
├──────────┼─────────────┼─────────┤
│ es       │      1      │    0    │
│ en       │      1      │    0    │
│ sr       │      1      │    1    │
└──────────┴─────────────┴─────────┘

(use "lingui extract" to update catalogs with new messages)
(use "lingui compile" to compile catalogs for production)
Notice how the Missing field for the Spanish language is 0, which means that we have translated all the missing strings in the Spanish file.
This is the gist of translating. Now, let’s start integrating Lingui.js with Next.js.
Compiling messages
For the application to consume the files with translations (.po files), they need to be compiled to JavaScript. For that, we need to use the lingui compile CLI command.
After the command finishes running, you will notice that inside the locale/translations directory, there are new files for each locale (es.js, en.js, and sr.js):
├── en
│   ├── messages.js
│   └── messages.po
├── es
│   ├── messages.js
│   └── messages.po
└── sr
    ├── messages.js
    └── messages.po
These are the files that are going to be loaded into the application. Treat these files as build artifacts and do not manage them with source control; only .po files should be added to source control.
Working with plurals
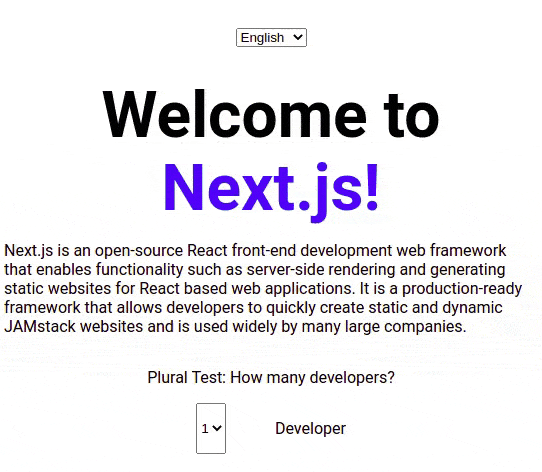
You might be working with singular or plural words (in the demo, you can test that with the Developers dropdown element).
Lingui.js makes this very easy:
import { Plural } from "@lingui/react/macro"

function Developers({ developerCount }) {
  return (
    <p>
      <Plural
        value={developerCount}
        one="Whe have # Developer"
        other="We have # Developers"
      />
    </p>
  )
}
When the developerCount value is 1, the Plural component will render “We have 1 Developer.”
You can read more about plurals in the Lingui.js documentation.
Now, different languages have different rules for pluralization. To accommodate those rules we are later going to use one additional package called make-plural.
Next.js and Lingui.js integration
This used to be the hardest part: integrating Lingui.js with the Next.js framework.
Now, you don’t need to manually configure the appropriate plural rules for each locale with loadLocaleData() because make-plural is now included in @lingui/core and Lingui automatically loads the appropriate plural rules based on the locale string.
This activates the locale, automatically enabling the plural rules.
import { i18n } from '@lingui/core'

i18n.load(locale, messages)
i18n.activate(locale)
For App Router (React Server Components):
// appRouterI18n.ts
import { setupI18n } from '@lingui/core'
export function getI18nInstance(locale: string) {
  return setupI18n({
    locale,
    messages: { [locale]: messages }
  })
}
After the Lingui.js code is initialized, we need to load and activate the appropriate language as follows:
// app/[lang]/page.tsx
import { setI18n } from '@lingui/react/server'
import { getI18nInstance } from './appRouterI18n'
import { Trans, useLingui } from '@lingui/react/macro'
export default function HomePage({ params: { lang } }: { params: { lang: string } }) {
  const i18n = getI18nInstance(lang)
  setI18n(i18n)

  const { t } = useLingui()

  return (
    <div>
      <h1>
        <Trans>Welcome to my app</Trans>
      </h1>
      <p>{t`This is a translated message`}</p>
    </div>
  )
}
If you want to use it in the entire app, make sure you add the following logic to app/[lang]/layout.tsx:
//src/app/[lang]/layout.tsx
import { setI18n } from "@lingui/react/server";
import { getI18nInstance } from "./appRouterI18n";
import { LinguiClientProvider } from "./LinguiClientProvider";

type Props = {
  params: {
    lang: string;
  };
  children: React.ReactNode;
};

export default function RootLayout({ params: { lang }, children }: Props) {
  const i18n = getI18nInstance(lang);
  setI18n(i18n);
  return (
    <html lang={lang}>
      <body>
        <LinguiClientProvider initialLocale={lang} initialMessages={i18n.messages}>
          <YourApp />
        </LinguiClientProvider>
      </body>
    </html>
  );
}
This lets the Next.js router manage multiple locales in the URL and automatically pass the lang parameter to every layout and page.
This is how you use it in a page:
// pages/index.tsx
import { Trans, useLingui } from '@lingui/react/macro'

export default function HomePage() {
  const { t } = useLingui()

  return (
    <div>
      <h1>
        <Trans>Welcome to my app</Trans>
      </h1>
      <p>{t`This is a translated message`}</p>
    </div>
  )
}
For client-side routes, you need to create a client component LinguiClientProvider.tsx,
where the Lingui.js code is initialized:
//LinguiClientProvider.tsx

"use client";

import { I18nProvider } from "@lingui/react";
import { type Messages, setupI18n } from "@lingui/core";
import { useState } from "react";

export function LinguiClientProvider({
  children,
  initialLocale,
  initialMessages,
}: {
  children: React.ReactNode;
  initialLocale: string;
  initialMessages: Messages;
}) {
  const [i18n] = useState(() => {
    return setupI18n({
      locale: initialLocale,
      messages: { [initialLocale]: initialMessages },
    });
  });
  return <I18nProvider i18n={i18n}>{children}</I18nProvider>;
}
All components that consume the translations need to be under the Lingui.js <I18Provider> component. In order to determine which language to load, we are going to look into the Next.js router locale property.
Translations are passed to the component via pageProps.translation. If you are wondering how is pageProps.translation property is created, we are going to tackle that next.
Before it gets rendered, every page in src/pages needs to load the appropriate file with the translations, which reside in src/translations/locales/{locale}.
Because our pages are statically generated, we are going to do it via the Next.js getStatisProps function:
// src/pages/index.tsx
import { GetStaticProps } from 'next'
export const getStaticProps: GetStaticProps = async (ctx) => {
  const translation = await loadTranslation(
    ctx.locale!,
    process.env.NODE_ENV === 'production'
  )

  return {
    props: {
      translation
    }
  }
}
As you can see, we are loading the translation file with the loadTranslation function. This is how it looks:
// src/utils.ts

async function loadTranslation(locale: string, isProduction = true) {
  let data
  if (isProduction) {
    data = await import(`./translations/locales/${locale}/messages`)
  } else {
    data = await import(
      `@lingui/loader!./translations/locales/${locale}/messages.po`
    )
  }

  return data.messages
}
The interesting thing about this function is that it conditionally loads the file depending on whether we are running the Next.js project in production or not.
This is one of the great things about Lingui.js; when we’re in production, we’re going to load compiled (.js) files. But in development mode, we’re going to load the source (.po) files. As soon as we change the code in the .po files, it’s going to immediately reflect in our app.
Remember, .po files are the source files where we write the translations, which are then compiled to plain .js files and loaded in production with the regular JavaScript import statement. If it weren’t for the special @lingui/loader! webpack plugin, we would have to constantly manually compile the translation files to see the changes while developing.
Changing the language dynamically
Up to this point, we handled the static generation, but we also want to be able to change the language dynamically at runtime via the dropdown.
First, we need to modify the _app component to watch for location changes and start loading the appropriate translations when the router.locale value changes. This is pretty straightforward; all we need to do is use the useEffect Hook.
Here is the final layout component:
// app/[lang]/layout.tsx
import { setI18n } from '@lingui/react/server'
import { getI18nInstance } from './i18n'
import { LinguiClientProvider } from './LinguiClientProvider'
import { LanguageSwitcher } from './components/LanguageSwitcher'

type Props = {
  params: { lang: string }
  children: React.ReactNode
}

export default function RootLayout({ params: { lang }, children }: Props) {
  const i18n = getI18nInstance(lang)
  setI18n(i18n)

  return (
    <html lang={lang}>
      <body>
        <LinguiClientProvider
          initialLocale={lang}
          initialMessages={i18n.messages}
        >
          <LanguageSwitcher currentLocale={lang} />
          {children}
        </LinguiClientProvider>
      </body>
    </html>
  )
}
According to the current Lingui documentation for React Server Components, dynamic switching is not recommended, because server-rendered locale-dependent content would become stale.
Instead, you should redirect users to a page with the new locale in the URL.
Now, we need to build the dropdown component. Every time the user selects a different language from the dropdown, we are going to load the appropriate page.
For that, we are going to use the Next.js router.push method to instruct Next.js to change the locale of the page:
// app/[lang]/components/LanguageSwitcher.tsx
'use client'

import { usePathname } from 'next/navigation'
import Link from 'next/link'

type Locale = 'en' | 'sr' | 'es'

const languages = {
  en: 'English',
  sr: 'Serbian',
  es: 'Spanish'
}

export function LanguageSwitcher({ currentLocale }: { currentLocale: Locale }) {
  const pathname = usePathname()
  const pathnameWithoutLocale = pathname.replace(`/${currentLocale}`, '') || '/'

  return (
    <select
      value={currentLocale}
      onChange={(e) => {
        const newLocale = e.target.value
        window.location.href = `/${newLocale}${pathnameWithoutLocale}`
      }}
    >
      {Object.entries(languages).map(([locale, label]) => (
        <option key={locale} value={locale}>
          {label}
        </option>
      ))}
    </select>
  )
}
The LanguageSwitcher removes the current locale from the pathname and also redirects to the same page with the new locale.
Here is a better approach with Links (no full page reload):
export function LanguageSwitcherLinks({ currentLocale }: { currentLocale: Locale }) {
  const pathname = usePathname()
  const pathnameWithoutLocale = pathname.replace(`/${currentLocale}`, '') || '/'

  return (
    <div>
      {Object.entries(languages).map(([locale, label]) => (
        <Link
          key={locale}
          href={`/${locale}${pathnameWithoutLocale}`}
          className={locale === currentLocale ? 'active' : ''}
        >
          {label}
        </Link>
      ))}
    </div>
  )
}
Middleware for Locale Detection:
// middleware.ts
import { NextRequest, NextResponse } from 'next/server'

const locales = ['en', 'sr', 'es']
const defaultLocale = 'en'

export function middleware(request: NextRequest) {
  const { pathname } = request.nextUrl

  const pathnameHasLocale = locales.some(
    (locale) => pathname.startsWith(`/${locale}/`) || pathname === `/${locale}`
  )

  if (pathnameHasLocale) return

  const locale = getLocale(request)
  request.nextUrl.pathname = `/${locale}${pathname}`
  return NextResponse.redirect(request.nextUrl)
}

export const config = {
  matcher: ['/((?!_next|api|favicon.ico).*)']
}
The middleware function implements locale detection and redirects to a locale-prefixed URL:
// middleware.ts
function getLocale(request: NextRequest): string {

  const cookieLocale = request.cookies.get('NEXT_LOCALE')?.value
  if (cookieLocale && locales.includes(cookieLocale)) {
    return cookieLocale
  }

  const acceptLanguage = request.headers.get('accept-language')
  // ... parse and match

  return defaultLocale
}
The getLocale function checks cookie and the Accept-Language header
Pseudolocalization
Now I’m going to address all the pseudo code that you have seen in the examples.
Pseudo-localization is a software testing method that replaces text strings with altered versions while still maintaining string visibility. This makes it easy to spot which strings we have missed wrapping in the Lingui.js components or macros.
So when the user switches to the pseudo locale, all the text in the application should be modified like this:
Account Settings --> [!!! Àççôûñţ Šéţţîñĝš !!!]
If any of the text is not modified, that means that we probably forgot to do it. When it comes to Next.js, the framework has no notion of the special pseudo localization; it’s just another language to be routed to. However, Lingui.js requires special configuration.
Other than that, pseudo is just another language we can switch to. pseudo locale should only be enabled in the development mode.
Internalization with next-intl
next-intl is another popular option for internationalization in Next.js. It’s a great choice when building exclusively with Next.js, as it requires less tooling configuration and includes better TypeScript integration (Autocomplete for message keys out of the box).
To get started with next-intl, you need to install it in your Next.js project as follows:
npm install next-intl
This is what your project structure should look like:
app/
├── [locale]/
│   ├── layout.tsx
│   └── page.tsx
├── i18n.ts
messages/
├── en.json
├── es.json
└── sr.json
middleware.ts
next.config.js
Next, add the following to the i18n.ts file:
//i18n.ts
import { getRequestConfig } from 'next-intl/server'

export default getRequestConfig(async ({ locale }) => ({
  messages: (await import(`../messages/${locale}.json`)).default
}))
Also, add the following to the middleware.ts file:
//middleware.ts
import createMiddleware from 'next-intl/middleware'

export default createMiddleware({
  locales: ['en', 'es', 'sr'],
  defaultLocale: 'en'
})

export const config = {
  matcher: ['/((?!api|_next|.*\..*).*)']
}
Add the following to next.config.ts to set up the plugin, which links your i18n/request.ts file to next-intl:
//next.config.ts
const withNextIntl = require('next-intl/plugin')('./i18n.ts')

module.exports = withNextIntl({
  // Your Next.js config
})
Wrap your root layout’s children with NextIntlClientProvider so your request config is accessible in Client Components:
// app/[locale]/layout.tsx
import { NextIntlClientProvider } from 'next-intl'
import { getMessages } from 'next-intl/server'

export default async function LocaleLayout({
  children,
  params: { locale }
}) {
  const messages = await getMessages()

  return (
    <html lang={locale}>
      <body>
        <NextIntlClientProvider messages={messages}>
          {children}
        </NextIntlClientProvider>
      </body>
    </html>
  )
}
Now, you can use translations in your page components as follows:
import {useTranslations} from 'next-intl';

export default function HomePage() {
  const t = useTranslations('HomePage');
  return <h1>{t('title')}</h1>;
}
For async components, you can use the awaitable getTranslations function as follows:
import {getTranslations} from 'next-intl/server';

export default async function HomePage() {
  const t = await getTranslations('HomePage');
  return <h1>{t('title')}</h1>;
}
Improving translation with the useExtracted API
The useExtracted API is next-intl’s answer to Lingui’s macro-based message extraction. It addresses one of the main pain points of traditional i18n (managing keys manually).
Notice how we had to create new files for each locale (es.js, en.js, …) with their corresponding translations. With useExtracted, the messages to be translated are automatically extracted to the configured JSON locales:
import { useExtracted } from 'next-intl'
export function QuickFeature() {
  const t = useExtracted()

  return (
    <div>
      <h1>{t('New Feature')}</h1>
    </div>
  )
}
With this, messages are automatically extracted during next dev or next build to messages/en.json and other configured JSON locales as follows:
//messages/en.json
{
  "VgH3tb": "New Feature"
}
This will also sync automatically when the translated messages are modified.
Conclusion
In this article, I have shown you how to translate and internationalize a Next.js application. We have done static rendering for multiple languages and on-demand language switching. We have also created a nice development workflow where we don’t have to manually compile translation strings on every change. Next, we implemented a pseudo locale in order the visually check if there are no missing translations.
If you have any questions, post them in the comments, or if you find any issues with the code in the demo, make sure to open an issue on the github repository.
The post The complete guide to internationalization in Next.js appeared first on LogRocket Blog.
This post first appeared on Read More