
Designing account recovery UX for 2FA-protected accounts
Setting up 2FA is a mandatory general security requirement while using almost all digital products nowadays. A well-designed product never permanently prevents the user from accessing the account if the user has lost access to the configured primary 2FA method.

It’s a designer’s responsibility to help users recover their accounts by creating friendly, practical, and secure user flows and concise UI segments when users encounter trouble with the primary 2FA method.
Why recovery UX is critical
2FA methods can fail, so such a scenario shouldn’t lock the user’s account permanently and ruin users’ trust and confidence in your product:
- Risk of lockout — Users may lose access to the primary 2FA method due to a device theft, a broken device, or a device compromise event. A secure and convenient recovery path should exist to support users in avoiding permanent account lockout
- Increases trust — The presence of a recovery path eliminates the user’s lockout fear and builds trust and confidence for continuously using 2FA for strengthened security
Common recovery methods
Modern digital products offer a combination of the following recovery methods:
- Secondary 2FA method — Your product should let the user set up a secondary 2FA method, so the user can use it to access the product if the primary method fails
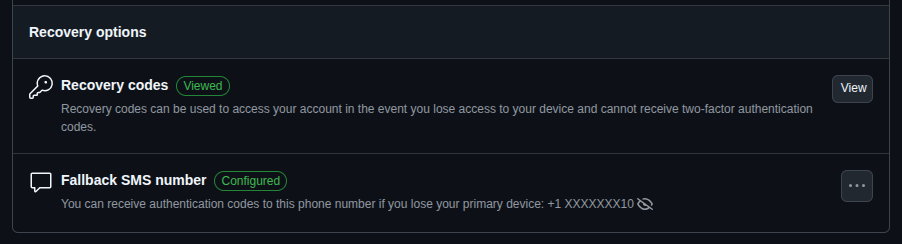
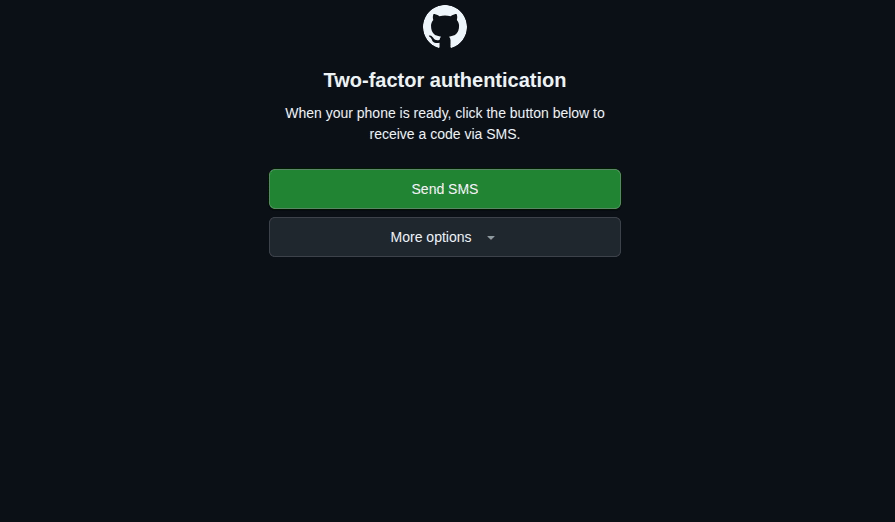
- Private recovery channel — The product can use a private, trustworthy communication channel to deliver a verification code or link for recovery, such as a verified email or phone number (for SMS or voice OTP)
- Trusted devices — The product can ask the user to log in from a specific device that the user used to access the product for a long time, also known as a trusted device, to skip 2FA
- Recovery codes — Let users access their accounts using static recovery codes, also known as backup codes that users securely saved during the first 2FA configuration
- Personal identity verification — An AI-powered, automated, or human support-driven manual system can verify the user with personal identity documents like ID cards, passports, or driving licenses, or security questions
Designing the recovery flow
Use the following best practices to create a smooth and secure recovery for all users:
- Progressive disclosure — Don’t list all secondary and recovery 2FA options immediately in the 2FA prompt ; disclose them progressively based on a dynamic risk assessment strategy and recovery needs, e.g., using a “Try another way” option
- Rate limiting and delay — If the password is somehow stolen, 2FA should protect the user’s account, but on the other hand, the real user should be able to retry 2FA with convenience, so add reasonable rate limiting and delay, balancing security and usability, e.g., blocking the SMS verification option for 24 hours after 5 failed attempts
- Clear feedback and confirmation — Ask the user for confirmation before sending recovery codes or links, and clearly mention to which channel the codes are sent, along with the next steps to complete authentication
UX considerations and risk trade-offs
The following UX tips help you balance user convenience and security requirements in recovery flow design:
- Prioritize both usability and security — Blend security implementations with user-centered, convenient, standard 2FA flows to strengthen security seamlessly with usability principles
- Transparent recovery policies — Document recovery policies and present them to the user using read-more links during 2FA configuration, and notify any important policy changes via email or app notifications continuously
- Recovery option visibility — The product should recommend that the user use a 2FA recovery method to prevent account lock-in immediately after configuring the first 2FA method
Summary: Recovery UX checklist
A smooth and secure recovery flow is mandatory if your product lets users set up any 2FA method to add another layer of security. Here is a practical checklist to create a better 2FA recovery UX:
- Give users the freedom to choose a preferred 2FA method and recommend that they activate several alternate 2FA options for recovery purposes
- Prompt the primary, the most convenient, and secure 2FA method, and offer an option to try a secondary option if needed
- Provide backup codes after the first 2FA setup with a download option. Educate users about backup code security, recommend storing it in a safe space, and provide an option to regenerate in case of backup code breach
- If all 2FA methods fail, let the user get help for manual account unlock from a support desk or an automated identity system by submitting a ticket, sending a message, writing an email, or going through a step-by-step UI — never leave them stranded with a forever-locked account
- Once the user bypasses 2FA using a backup code or any available method, the product should ask the user to update the failed 2FA method
- If a backup code is used to gain recovery access, regenerate new backup codes
- Log and analyze account recovery attempts using an automated service or mechanism. Notify the user about suspicious attempts and recommend that the user change the password if the user didn’t try to recover the account
FAQs
When should the user set up a recovery method?
Immediately after setting up the first 2FA method. If skipped, sooner
Can recovery flows be skipped during onboarding?
Yes, but the product should warn users about the risk of lockout using banners or notifications if there is no verified email or phone number for account recovery purposes.
How long should a manual recovery take?
Depends on the risk assessment results of the particular account and product domain. For high-risk scenarios (e.g., paid accounts, financial apps, email clients, etc.), a manual recovery may take 1 to 7 days, but for low-risk scenarios (e.g., free accounts, entertainment apps, etc.) may only take several hours or a day. Take time for identity theft prevention while avoiding user frustration with good time estimations and by notifying the progress.
The post Designing account recovery UX for 2FA-protected accounts appeared first on LogRocket Blog.
This post first appeared on Read More