If you’ve spent any time poking around the self-hosting world, you’ve likely come across containers. They let you run software in isolated environments that carry their own dependencies, keeping things clean and predictable without the extra weight of a full virtual machine.
That’s made them a staple for everything from running a home media server to deploying production applications. Spin one up, use it, and tear it down. The host machine stays clean all the way through.
Docker is where most people start, and for good reason. It has the ecosystem, the documentation, and years of community knowledge behind it. Podman is Red Hat’s alternative, largely compatible with Docker on the command line but without a daemon running in the background, and it runs containers as a regular user rather than root.
Now managing containers can be a handful if you have got a bunch of them running, and this is where Pods comes in. It is built in Rust and uses libadwaita for its interface, following GNOME’s design principles closely.
From a single window, you can pull and build images, create containers and pods, start and stop them in bulk, view logs, monitor processes, inspect details, and clean things up when you’re done.
With Pods 3.0, the entire backend was rebuilt to support multiple container engines, with experimental Docker support being the first addition to come out of that change.
I took this release for a test run to see how it performed.
Pods: Easy Container Management
I ran Pods on a Fedora Workstation 43 system, which already had Podman pre-installed. Do keep in mind that I had no prior experience with containers going into this, so I stuck to simple images like PodmanHello, nginx, and BusyBox to get a feel for how the app handled the basics.
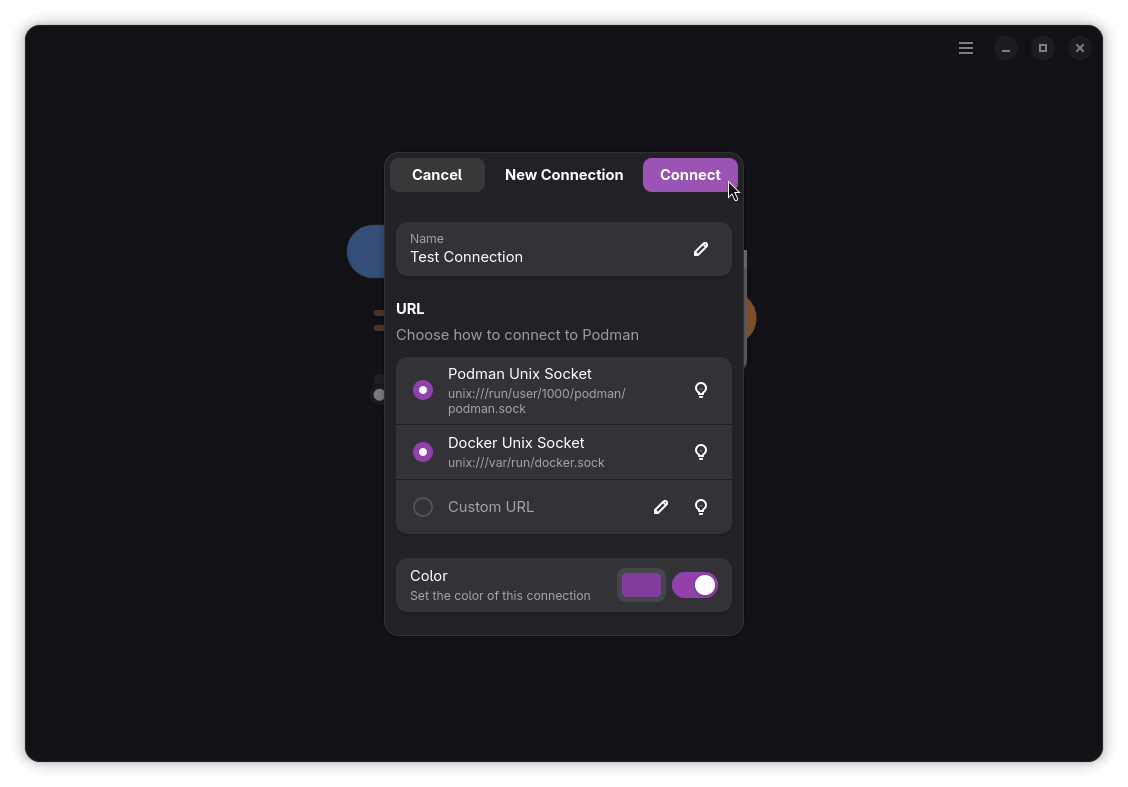
After enabling the Podman socket, I launched Pods and set up a new connection. Two URLs were already pre-selected, the Podman Unix Socket and the Docker Unix Socket, with the option to point to a custom URL if needed.
I gave the connection a name and a color, and Pods quickly populated with the available containers.
From there, I could see the telemetry of any running containers, along with options to kill, restart, start/stop, pause, and delete them. I tested the start/stop toggle with nginx, and it worked without a hitch.
I even double-checked that by running the podman ps command before and after I had used the start/stop toggle, and the results were positive. Pods was able to start and stop a container without much fuss.
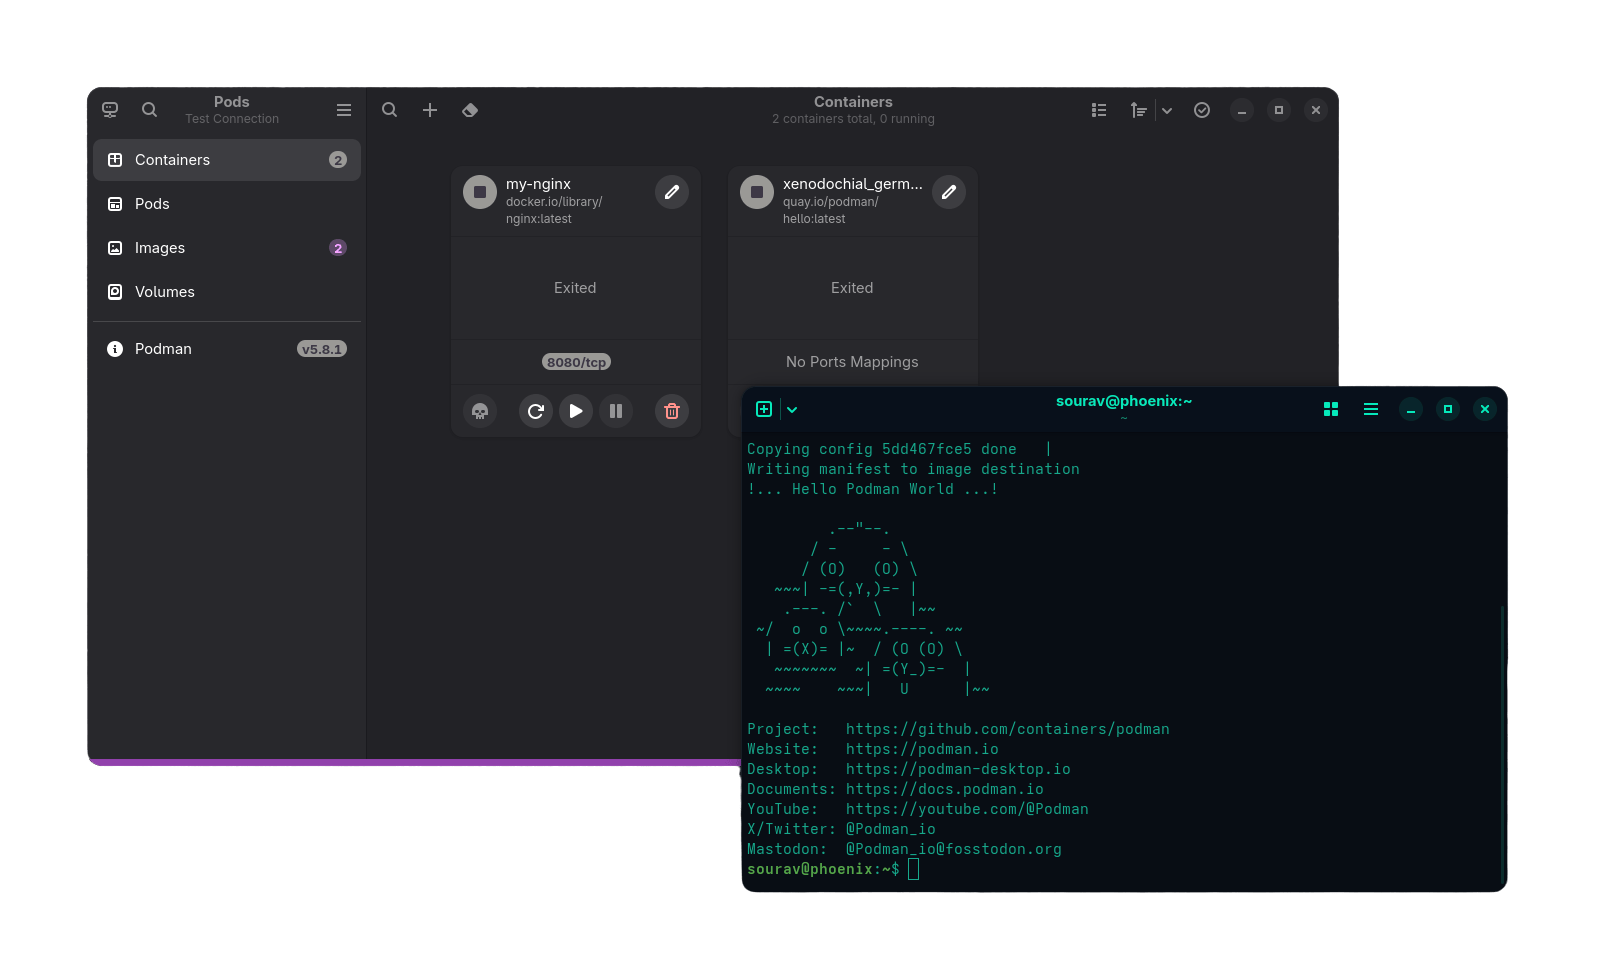
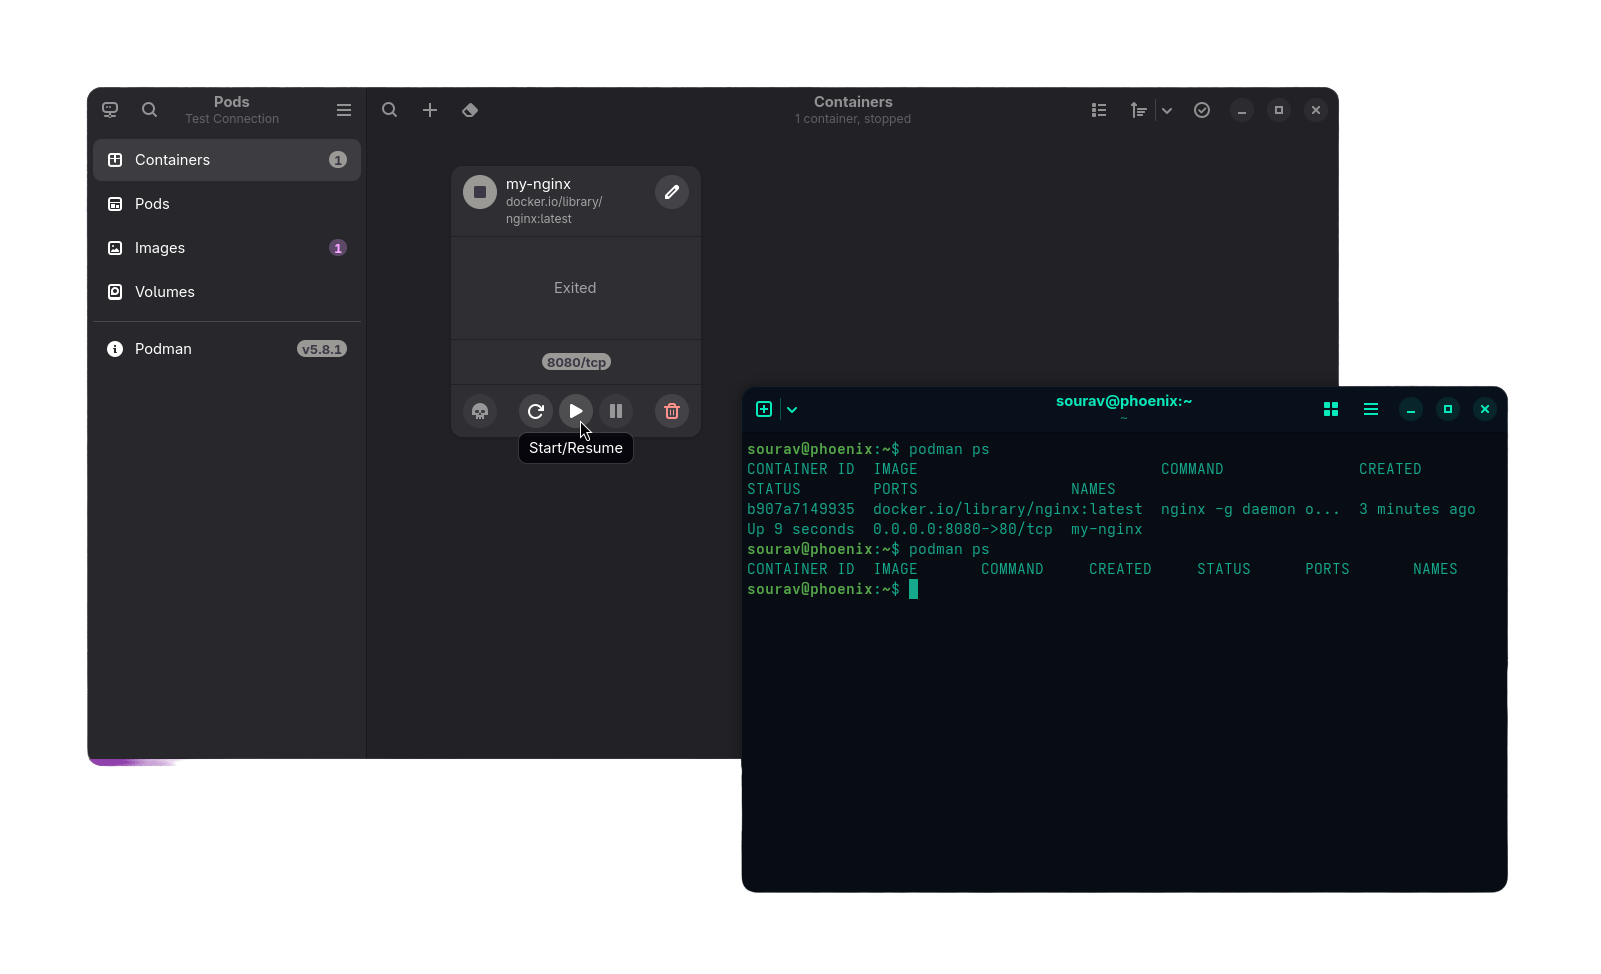
Starting and stopping containers using Pods.
I did notice that freshly pulled containers came with long, jargony names by default. That was easy enough to sort out though, as Pods lets you rename them directly from the interface.
You can click on the pen icon near a container’s name to do so!
And in cases where I had pulled something by mistake or just didn’t need a container around anymore, I could delete it just as quickly using the delete button.
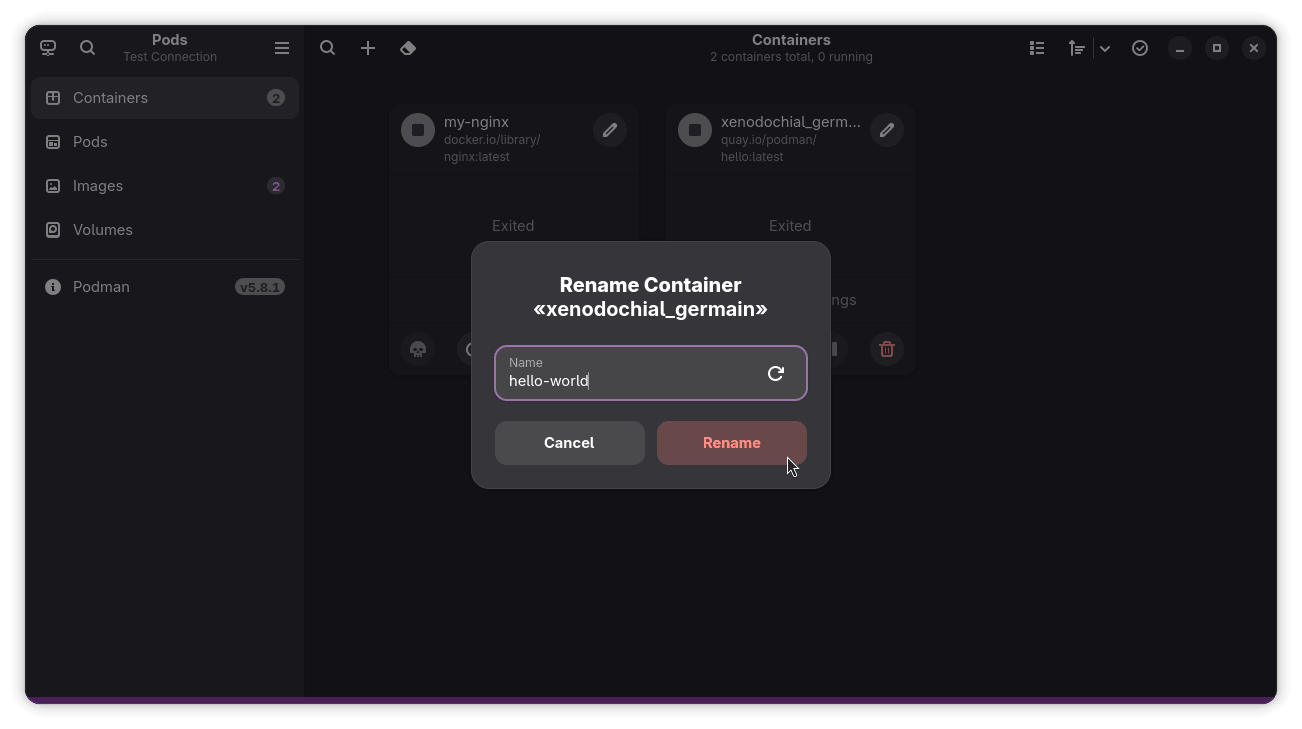
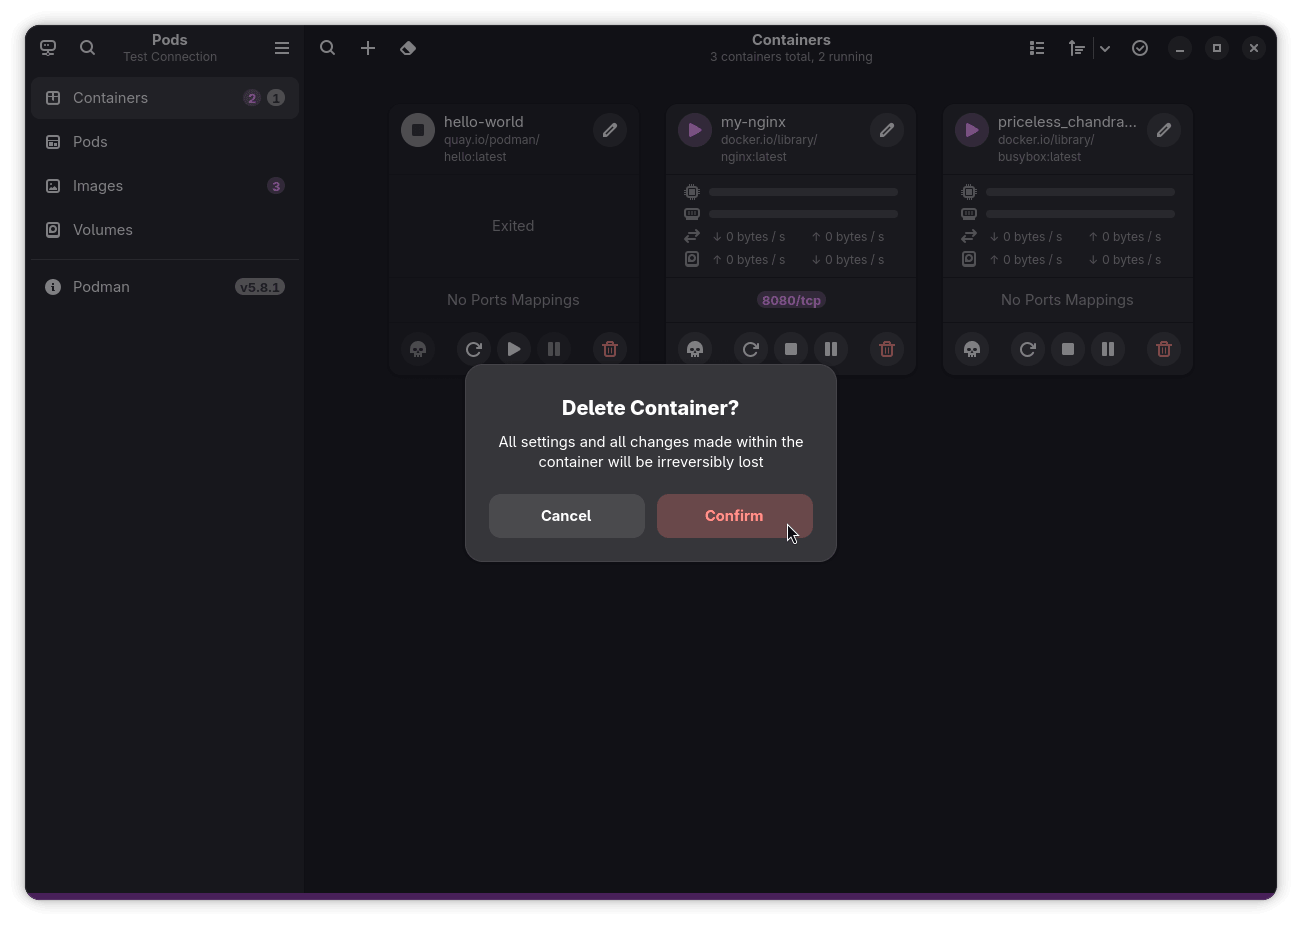
Renaming and deleting containers using Pods.
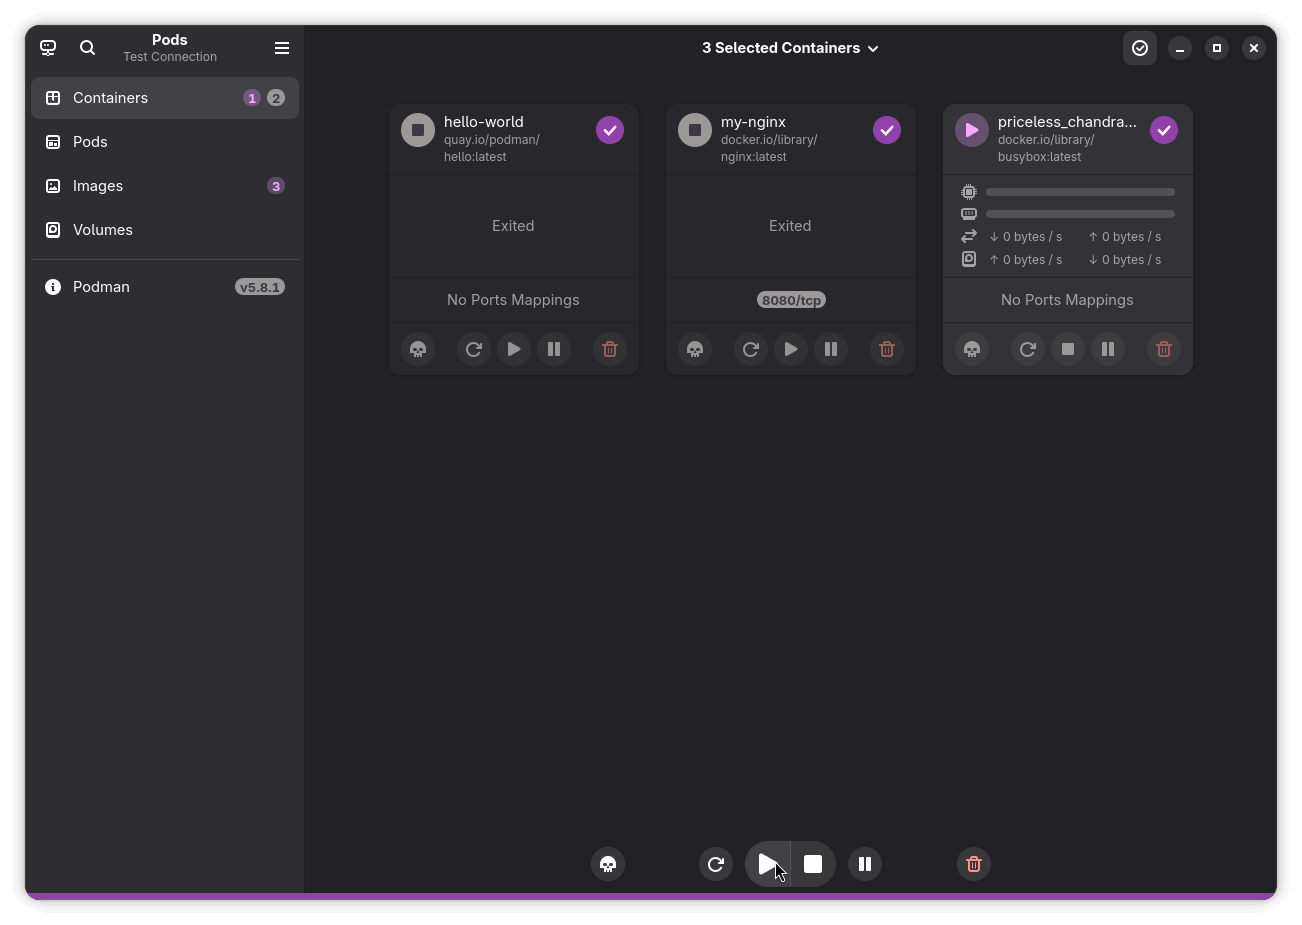
Pods also let me batch manage containers through a “Multi-Selection” mode, which surfaces the same kill, restart, start/stop, pause, and delete options but across multiple containers at once.
This can come in handy when you have several containers you want to act on without going through each one individually.
You will find this mode in the top bar menu; just click on the checkmark button.
I could even create pods, which are groups of containers that share the same network and resources, but I stuck to focusing on containers for this one. I went into the Images page to see what options were on offer. Here, I could see each image’s properties, like its ID, when it was created, how much storage it was using, and what command it had.
I could also inspect the image properties in structured text for a more detailed look under the hood, browse through the history of the image, and check the repository tags it was associated with.
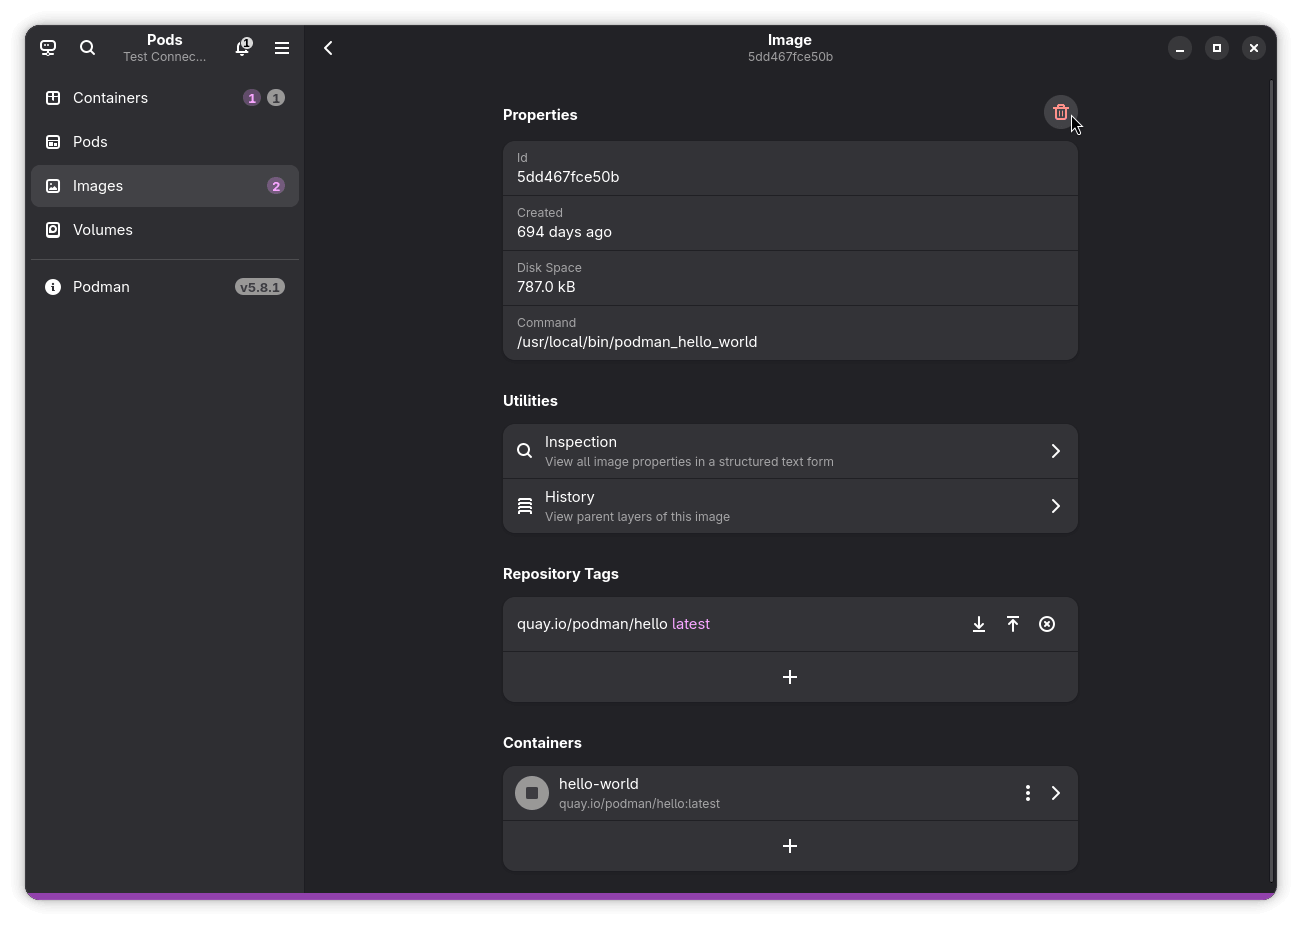
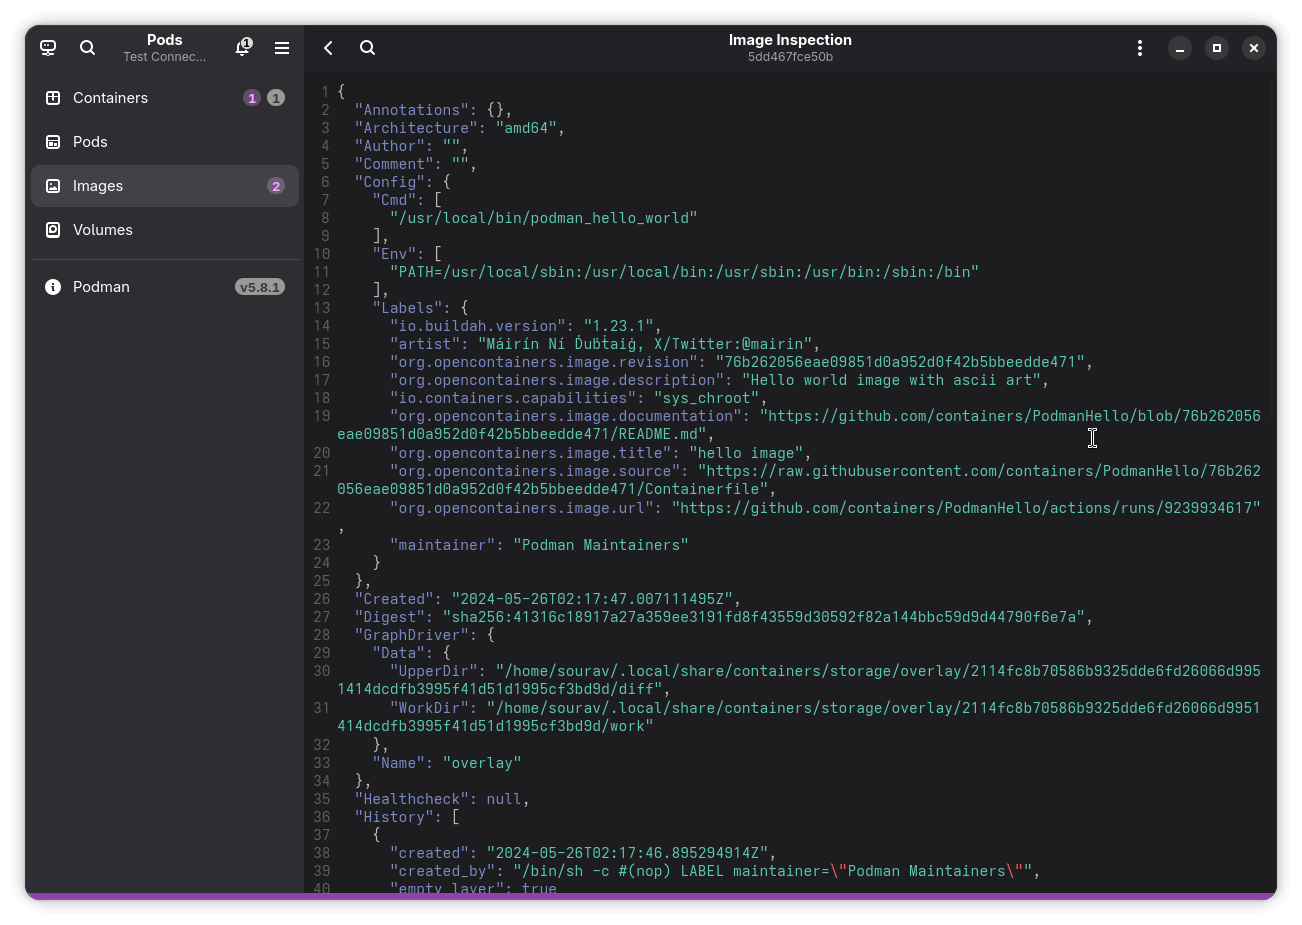
Image management in Pods.
Finally, I checked out the Prune Stopped Containers option, which lets you bulk remove containers that are no longer running. It even shows a calendar view to set a cutoff time, so you can prune only containers that stopped before a specific date rather than wiping everything at once.
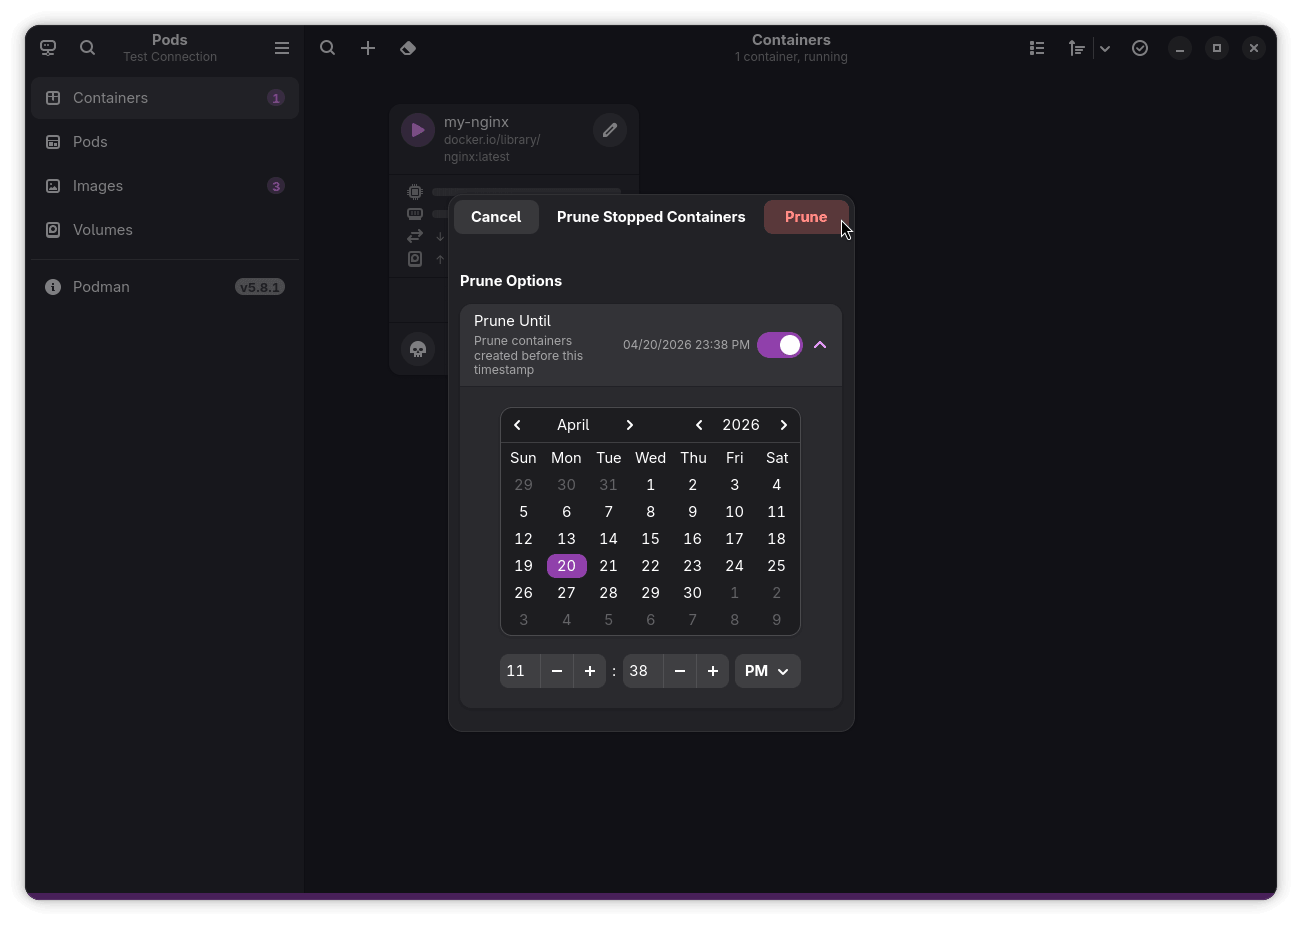
You can find it via a dedicated button in the top bar that looks like an eraser.
Get Started
If you think Pods would be a good fit for your workflow, then you can install it from Flathub, or, alternatively, by running the following command:
flatpak install flathub com.github.marhkb.PodsIf you prefer building from source, then you can visit the project’s GitHub repository.
![]()
This article first appeared on Read More